
How to ACTUALLY Size Your Artwork (Cheat Codes Most Printers Won’t Tell You)
- Celeste Hardesty
- Apr 10
- 2 min read

If you haven’t read our original guide yet, start here:👉 https://www.finishline.graphics/post/how-big-should-my-artwork-be-a-guide-to-print-sizes-for-infant-toddler-youth-adult-apparel
That’ll give you the industry standard sizes.
But here’s the truth…
Industry standards are just guesses.
And if you rely on them alone, you’re rolling the dice every time you print.
At DTF Transfer Maker, we see it daily—designs that looked “perfect” on a screen show up too small, too big, or just… off.
So let’s fix that.
The Real Problem With Artwork Sizing
Your screen lies.
Mockups lie.
Even “standard size charts” lie sometimes.
Why? Because:
Every design is different (text vs logo vs full graphic)
Every garment fits differently
Every brand prints slightly different
And your vision doesn’t always match a generic size chart
So instead of guessing…
Let’s give you control.
🔥 Cheat Code #1: The Paper Test (Most Effective Method)

This one is simple—and ridiculously effective.
Here’s what to do:
Print your design at a few different sizes on regular paper
Cut them out
Lay them on the actual garment
That’s it.
Why this works:
You’re no longer guessing based on a screen—you’re seeing it in real life, on the actual shirt.
What most people do instead:
They eyeball it…Or trust a “12-inch wide is standard” rule…
And that’s where things go wrong.
Pro Tip:
Print 2–3 size variations (for example: 10”, 11.5”, 13”) and compare side by side.You’ll instantly know which one feels right.
👉 This alone can save you from reprints, wasted transfers, and unhappy customers.
🔥 Cheat Code #2: The Tape Method (No Printer Needed)
No printer? No problem.
Here’s how to do it:
Size your artwork inside our builder at
Take the dimensions (example: 11.5” wide x 14” tall)
Lay your shirt flat
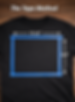
Use blue painter’s tape to outline that exact size on the garment
Now what?
You’ve just created a real-world mockup.
No guessing.No assumptions.No “I think this will work…”
You can physically see:
How much space it takes up
How it sits on the chest
Whether it looks balanced
Why this is powerful:
Most people rely on digital mockups…
You’re now working with real placement and real scale.
That’s how you separate yourself.
💡 What This Means for Your Business
If you’re selling apparel…
This is where you win.
Most of your competition is:
Guessing sizes
Using default templates
Hoping it looks good
You?
You’re delivering:
Accurate sizing
Better-looking products
True-to-life mockups your customers can trust
That’s how you stand out—and get repeat business.
🚀 Final Thoughts (Don’t Skip This)
If there’s one thing to take away:
👉 Stop guessing your artwork size.
Take 5–10 extra minutes upfront using these cheat codes and you’ll:
Reduce mistakes
Save money
Deliver better products
Look like a pro
💥 Want to Make This Even Easier?
We built tools specifically for this.
Use our Gang Sheet Builder to:
Size your artwork precisely
Lay out multiple designs
Get exactly what you see